Monday, May 16, 2011

Banana Nut Bread

Hi,
It's been a very long time and i know i have been a very bad blogger :(. But with a little one who is entering the Terrible Two phase , i hardly have time to sit in front of a laptop !!!! My daughter loves saying "close" and shutting down the laptop :P. By the time she goes to bed , i am totally drained out to sit and do anything *sigh* !!!!


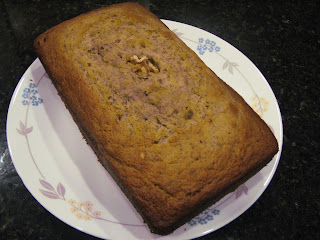
But now I am back and this time with a recipe for Banana Bread. I do have one in my blog already but this time i had a whole load of ripe bananas sitting at home and so wanted something different. So went on a hunt for a good recipe and found this one by the Neelys ( Pat & Gina Neely of Food Network fame) !!!!! It was a super duper hit with my little one and from then whenever i have overripe Bananas this is what i make at home :).


Recipe Source :

Adapted from The Neelys

Ingredients :

1.5 cups All purpose flour
1 stick butter ( at room temp)
2 eggs ( at room temp )
1/2 cup Sour cream ( at room temp )
1 tsp Baking Powder
1 tsp Baking Soda
1 tsp Salt
1 cup Sugar
3 ripe bananas ( the riper the better )
2 tsps Vanilla extract
1/2 cup chopped Walnuts 

How to go about it :

Butter a loaf pan , preheat the oven to 350F.

Sieve all the dry ingredients in a bowl ( flour , baking powder , baking soda and salt ). Mash the bananas in another bowl.

In the meantime beat together the butter and sugar till it is fluffy !!! To this add eggs one at a time.

Now add the vanilla extract . To this add bananas and sour cream.

Once its all mixed together add the flour mixture.

Now add in the walnuts and gently mix it in with a spatula.

Pour the mixture into a loaf pan and bake it for 1hr 30 mins ( my oven got it done in 70 mins ). Check the center with a tooth pick. If it comes out clean the bread is done !!!!!

Hmmm the smell of the baking bread was enough to wake up my little one from her sleep. Hardly was it out of the oven that she wanted a piece !!!!! 

Enjoi it in the morning or in the evening as a snack !!!!

Have fun Baking !!!!!

Wednesday, February 2, 2011

Easy Sponge cake !!!

Hi All,


It's been a real long break for me. We were moving again , then had friends visiting and staying with us. Then the bigger surprise was my Dad who had not seen his granddaughter from her birth decided to make a trip to see her (not to see his daughter but his granddaughter.. poor me). So 2010 came to an end with Dad leaving back to India :(. Hmmm i really do miss my parents ..... the downfall of living in the USofA i guess !!!!!


So let me begin this post wishing everyone a very Happy New Year (though a month late)!!!! The New Year brought a never before seen snowstorm in Atlanta and it was a nightmare having to sit at home for 5 days as the roads were not cleared ..... !!!! After having lived in New Jersey this was a new experience for us ... to stay cooped at home !!! 


Here i was ..sitting at home , with nothing to do ...as in could not go out. And my daughter hated being cooped up continuously .  My daughter loves it when the oven light goes on and stays close to it for the entire duration that something is being baked in the oven. So i decided to bake something that would go with the evening coffee.


The sponge cake recipe was given to me by a good friend Ramya of http://ramyaacooks.blogspot.com/ even before my daughter was born and its always turned out excellent. Every time my Hubby feels like having cake this is his first choice. It is also a hit with my DD :). But this time for a change instead of using a normal square or round baking pan i decided to put to use my brand new Bundt pan. And boy did it turn out good !!!! Or rather should i say great ;).


The above photo if you notice has been cracked on one end :(. This is because i did not allow the cake to cool once i removed it from the oven and in a mad rush turned it over. As they say i think i have to practice patience when it comes to a cake cooling down..... :).


The photo above is after cutting off the part where it was cracked ;).. and such a big piece went into the tummies of me and my DD !!!!!


Coming to the recipe ...


Ingredients :


1 stick  unsalted butter( room temperature)

1 3/4 cups cake flour 
2 teaspoons baking powder 
1/2 teaspoon salt 
1 cup sugar 
3 large eggs( room temperature )
2 teaspoon pure vanilla extract 
2/3 cup buttermilk( room temperature )


To make the cake :


Grease a square or round or in my case a bundt pan with butter and flour and keep it aside.
Also preheat the oven to 350F.


Now sieve the flour , baking powder and salt and keep it aside.


In a bowl beat together butter and sugar till its all fluffy. To this add eggs one at a time and beat each egg till its all well mixed. Now add the vanilla extract and mix it together with the butter and eggs.


Now add the flour (3 parts) and buttermilk ( bm , 2 parts)  in parts to the wet ingredients starting with flour and ending up with flour ( flour + bm + flour + bm + flour ).


Remember to scrape the sides of the bowl as you beat the mixture.


Pour the mixture into the cake pan and bake for 40 mins . 


Normally it takes me 40 mins but when i baked it in a bundt pan it was all done in 30 mins.
To check if the cake is done insert a toothpick into the cake and if it comes out clean you are all set !!!!


Cool the cake for 10 to 15 mins , invert , slice and enjoy !!!!!!


It goes well as a coffee time cake and my family loves to eat it with ice-cream and strawberries as a after dinner dessert !!!!


Let me know if you like it too :)


Tuesday, August 24, 2010

Simple and Easy Potato Fry !!!!

Been a busy month for me , what with my daughter turning "1" :) , the birthday party and with my hubby travelling on weekdays which makes it impossible for me to sit in front of my laptop for more than a few minutes as my daughter loves the laptop and refuses to allow me to sit in front of it. Plus she misses her Dad a lot and hence her sleeping time is also cut down :(..... this is just a small idea of my time at home right now :).


I finally put her to sleep and thought let me post something simple and easy :)
Everyone has a comfort dish and mine is Potatoes in any form :). Any time of the day -  be it for breakfast , lunch or dinner i would not mind eating them. As a filling for sandwiches , as a side dish for lunch or dinner !!!! Hmmmm even writing about it tempts me to make some :).
To date my hubby pulls my leg everytime i make this dish. The reason being that when i got married i did not know the ABC of cooking. Even a simple Rasam was something i learnt from my hubby. But the very first dish i made on my own was this and it turned out perfect :). So to date he keeps asking me , "how come you kept saying you did not know to cook and this dish alone turns out so perfectly :)"


Ingredients :

1/2 of a medium size onion -  chopped
2 medium sized potatoes - diced into small cubes
1/2 tsp Cumin seeds
1/2 tsp Mustard seeds
1 tsp chilli powder
1/4 tsp turmeric powder
a pinch of asafoetida powder
Salt as required
Curry leaves and coriander as required
2 tbsps  Olive oil ( or any oil)

To go about :
Heat the oil in a pan. Once the oil is hot add the mustard and cumin seeds. Once the mustard starts spluttering add the curry leaves. Then add the chopped onions. Sauté the onion till it turns translucent.Then add the diced potatoes. Stir it up once then add all the powdered ingredients and salt. Stir it up completely and allow it to cook on a medium flame. Keep stirring it once in a while so that the potatoes  do not burn up. The medium flame allows the potatoes to cook up nicely. You can if you want leave it on medium flame to deep roast it or remove it once the potatoes are done. The choice is ultimately yours on how you want it done :). I used to deep roast it earlier but these days i don't as sometimes my little one eats what i eat and if deep roasted then she finds it difficult :)... hmmmm the choices we Mom's make for our little ones !!!!!
Garnish the potatoes with coriander and remove. Serve it hot with rice or even chappathis.
Variation : A slight variation to the above is to skip the onions and fry the potatoes :). This is also yummy !!!
This is a quick dish as it requires no separate boiling of the potatoes and gets done quickly.
I am sure nearly everyone out here has almost the same recipe for this dish.... but for those reading this, let me know how you make it in your kitchen :)


Friday, July 9, 2010

Chocolate Custard - and it is Eggless !!!!!!!!

Custard has always been an all time favourite dessert for me. If i have short notice of friends dropping by for lunch or dinner , then this is the one i prepare. I normally use Brown & polson Custard Powder and i always have an extra packet in stock in my pantry :).
Custard served with a good helping of any combination of fruits is a way to make kids eat fruits too :). And rather than plain custard , custard served with fruits is a better way to go about it.
The other day i was browsing through various blogs and i happened to chance upon Chocolate Custard - made from scratch. I was so tempted with the photos on the blog and with the recipe that i had to definitely try it :). Best of all , for all those veggie lovers out there , this recipe is eggless .
I made a couple of changes since post my daughter i prefer less chocolate in my desserts , and this from a person who has a big sweet tooth :P.
The source for the recipe is from DivineTaste.Since i wanted the custard more creamier i increased the quantity of cream.


Ingredients : 


1.5 cups milk
1.5 cups cream 
1/2 cup sugar
less than 1/4 cup cocoa powder
1/4 cup cornflour or cornstarch ( i had cornstarch and so i used it)
1 tsp vanilla extract
Extra cocoa powder for sprinkling ( i skipped this)


To go about making the custard :


Take a saucepan and mix 1 cup milk with the cream and set it in medium flame. In the meantime in a bowl mix the remaining milk with sugar , cornstarch and cocoa powder and set it aside. Make sure there are no lumps.
Once the milk + cream mixture comes to a boil , bring the flame to low and add the chocolate mixture to it. Keep it in low and keep stirring the mixture ensuring that no lumps are formed. Once the mixture starts thickening add the vanilla extract , stir it and remove from the flame.
Allow the mixture in the pan to cool , transfer it to custard bowls and refrigerate. 
I allowed the mixture to chill for almost 6 hrs ( made it in the morning , in time to serve it as dessert over lunch) before serving. 
As the original recipe suggests you can sprinkle with cocoa powder before you serve. I skipped this as like i already did say , i am not much a fan of too much chocolate in my desserts and hence the reduced cocoa powder in my recipe too :).


Your yummy chocolate custard is now ready to be served !!!!!!


try it out and let me know if it was a hit at your home too !!!!!

Tuesday, July 6, 2010

Brinjal Raita !!!


I am back and this time have a valid reason for such a late post... moving from state to state on short notice left me with loads of packing and then the unpacking !!!!!! And imagine with a 10 month old around :). 
Now i am almost settled and found time to sit online and do some work on the blog. In fact i have loads of posts sitting in my drafts but i hardly have the time these days :(.


This post is a different one - Brinjal raita. This was something i learnt from my Mom when she was here for my delivery last year. No day used to go by when i went without having Cucumber raita for lunch. But moving to NJ from CA , i never was happy with the quality of Cucumbers that i found in NJ. Was telling my Mom about it when she said she would make Brinjal raita. Not only was it a hit with me , but with my hubby too who is very finicky about his food!!!!!


This is also a hit with friends ,family and children too!!!!!. This goes well with Pulao varieties as well as with rice :).


Try it out and let me know :).


Ingredients :


Eggplant - 3 medium sized , finely chopped and place it in a bowl of water
Onion - 1/2 of a large sized Onion , finely chopped
Sour cream -  as desired
Curd - as desired
Cumin powder - 1/2 tsp
Mustard seeds - 1 tsp
Oil - 2 tsps
Salt - as required
Coriander leaves - chopped , to garnish


How to go about it :


Take a pan , add oil. Once it is hot , add mustard seeds. As they start popping add onions.
Once the onions turn transluscent add the cut eggplant.To this add the required salt , mix well and leave it on medium flame till the eggplant is finely cooked. If needed you can add a small amount of water to cook the eggplants.
Once cooked , remove the pan and allow the mix to cool down.


Once it is cool enough , transfer to a bowl , add sour cream and curd in the ratio of 3:1 and mix it well. 


Since we have already added salt while cooking , taste and if required add more salt. To this add the cumin powder and give the mixture a stir.


Add coriander leaves and the raita is ready to serve !!!!!!!


PS: You can make any changes you want to this as in :


i. I normally prefer more sour cream , but if one likes more curd , the ratio can be reversed or it can be just plain curd too :).


ii. You can also add fresh coconut gratings to this :).


The list is endless , but i always the prefer simple version ;P

Friday, June 11, 2010

Ven Pongal !!!!!

This has been sitting in my draft for almost a month , and then i decided that it has been long so here i am :).
Pongal is an authentic South Indian Dish and is made of rice. It's my all time favorite to day and nothing beats a plate of Pongal served with Sambhar , Chutney and Medhu Vada.
I was pregnant and this was my all time craving. Those days i hardly used to cook and left it all to my hubby. When i told him he made it one fine day but somehow something was not right and i refused to eat it. Poor hubby of mine did not have the heart to ask me to eat as i kept telling him i was preggy and this did not suit  my taste buds :P.
So there i was calling up my Mom for her recipe. A week later i made my hubby make the Pongal once more and this time stood next to him and kept cross checking if everything was as per the recipe my Mom gave us. I guess he must have been cursing me in his heart for being such a Big pain :). The Pongal was a hit with my Hubby too and to this day he insists that i make it as per my Mom's recipe. It's a hit with my friends and relative too.


Ingredients :
Rice - 1 cup ( i use Sona Masoori)
Moong Dal - 1/4 cup
1/4"inch ginger
4 cups water
1/2 cup milk
Salt to taste


To temper :


1 tsp cumin seeds
20-25 peppercorns freshly ground (coarsely , not a fine powder).
20 cashews .
2 to 3 coriander leaves
1/2 cup ghee ( or more if your taste buds call for it).


To go about it :


Wash rice and dal (some may fry the dal but i don't prefer it). Add rice , dal , water , milk , ginger , 1 tsp of ghee , salt to a pressure pan ( or cooker). Close the pan and allow it to cook for 4 whistles.
Once the rice is cooked , stir it up. Add ghee now and stir it again. The more the ghee , the tastier the Pongal in my opinion :). So if you are going to be calorie conscious , you can still reduce the ghee to suit your needs.
In the meantime in a pan add ghee ( don't give me a look :) ) , add coriander leaves , cumin , cashew and the coarsely ground pepper. Fry this till you get a nice smell  and please don't allow the cashew to deep roast as it will spoil the taste.
Add this to the cooked rice and stir it up well. 
           Pongal is now ready for serving with Chutney and /or Sambhar. Wish i had made Vada to go along with it ....*sigh* !!!!!


Electric cooker Version :


For those people who would like to make Pongal in the Electric rice cooker -  the process would remain the same , but the water + milk should be 7 cups. This comes out as good as the rice cooker version :).

Friday, May 14, 2010

Idli !!!!!!!!!!!!!!

Idli -  there used to be a time when i used to hate idli's. When i was doing my UG i had a bad experience with Idli's. The cook used to steam cook our idli's and when they come out they used to be all squishy. Man did i have an aversion to eating those idli's :(. Even home for vacations i used to refuse to eat idli's though of course Mom used to make them soft. Initially i used to avoid going to have either breakfast or dinner when the Menu indicated Idli. Then the hunger pangs used to force me to go have the squishy Idli's and the only compensation was the Homemade Idli Podi that i used to bring :).
Post Marriage when i came to the US we could not bring the Grinder with us as we were already overloaded and everyone told me that the Mixer Grinder never gave out good idli's. So there i was 2 years into marriage and had never made Idli's :). My hubby in fact loves Idli's and there never has been a day when he has not told me that i never made Idli's and my daughter at 9 months takes after her Dad - she loves Idli's :).
We finally got our own Grinder when i moved to NJ last September and since Mom was here it was a treat for us. And even after she left i continue the tradition of making Idli's for my family and luckily they turn out just right for me . The best part is that our friend's son who never used to eat anything makes it a point to always ask me " Aunty Idli?????" What would make me more happy????????????


I use my Mom's measurements for making recipe and to date it has never failed me. So here we go :)


Ingredients :


Idli Rice - 4 cups
Urad Dal - 1 1/4 cups
Fenugreek (vendayam) - 1tsp
Salt to taste
Water as required


To make the batter :


Soak the rice in a bowl big enough to hold 3 times the measurement provided and the Urad dal and fenugreek in another bowl and remeber the bowl should have the capacity to hold 3 times the provided measurement.
Soak it for atleast a minimum of 6 hours or you can soak it overnight.


In the grinder first grind the dal. Once it has reached a good consistency remove the batter to a vessel.
Next add the rice and grind it till required consistency is achieved.
Mix it with the dal batter . Add salt to taste and water asd required.


Allow the batter to ferment.Being in the US sometimes the batter does not ferment. So what i do is place the batter in the oven and leave the light on. The heat that the light generates helps in the fermentation process. I leave it overnight and by morning my batter is all fermented and ready :)


To make Idli's :


I don't have an idli cooker so i use my pressure pan. First oil the ildi plates or you can use a soft and clean white cloth over the plates. Pour the batter into the plate , place it in the pressure pan. Remember not to add the weight to the Pressure pan. If in high then 10 minutes would suffice for the idli to be cooked.
To check if the idli is ready , wet a finger in cold water , and make a hole in one idli. If there is no batter sticking on to your finger , your Idli is ready :).


Serve it with Idli podi , Sambhar or any variety of chutney.


In the pic , i served it with Homemade podi and Sambhar. Coconut or Onion chutney is also a very good combination for the idli.


My 9 month old has her idli with Ghee :P


Soft idli's make my mouth water :)........


Will be back soon with a recipe for my homemade podi too !!!!!!!!

Monday, April 26, 2010

Milk Peda

Sweets and me , we have an ongoing love affair :). I love sweets so much that during my pregnancy they were the root cause of my needing to go on a controlled diet :(
Recently i happened to be uploading some photos of Sweets and Dishes that i had made on Facebook and a lot of my friends wanted the recipe for Pedas. 
This recipe is a microwave version that i first tried out in 2009 when i had too much milk powder sitting idle at home and when i first started having my cravings for anything sweet :P . 
Very frankly i don't remember from where i got this recipe as back in 2009 i never blogged about Food and hence though i made a note of the recipe , i did not make a note of from where i got the recipe.


So the credit and my heartfelt thanks goes to whosoever gave me the recipe !!!!!!!!!!!!!!!


The ingredients needed and the procedure on how to make it are very simple and it should hardly take more than 15 mins of your time to make these . 


Ingredients :


Milk Powder - 2cups
Condensed Milk - 14oz can
Butter - 4oz (at room temperature)
Saffron strands - a few 
Nuts - Any that you may have at home . I used Almonds.
Ghee - 2 to 3 tsps


How to go about making the Pedas :


Take a Microwave(MW) safe Glass bowl and make sure it is deep and big enough to mix all of the above.
Add butter to the bowl and MW for a minute. If the butter has not melted MW for another 30secs.
To the butter add milk powder and stir it in slowly and make sure there are no lumps.
To the above add the can of condensed milk and stir it completely.
Place the bowl in the MW and leave it on for a minute.
Remove the bowl from the MW , stir the mixture and make sure there are no lumps. Leave it again for another minute.  When you remove the bowl from the MW you can see that the mixture has started to thicken. Stir the mixture and place it for 1 more minute.
If at the end of 3 minutes the mixture is not thick you can heat it again in the MW in 30sec intervals
Allow the mixture to cool for 15 to 20 mins.
Now apply ghee on your palms , take a small quantity of the mixture ( enough to make a ball ) and roll it in your hands.
Flatten it  , make a small hole in the center and place the Almond ( or any nut of your choice) in the center. 
Repeat the process for the entire mixture. 


Your yummy pedas are now ready to be served !!!!!!!!!!!!!!!


These are so easy to make that if you have milk powder and condensed milk you can make these in batches and serve for any get-together or even for parties , potlucks :).


Tiramisu

Hmmmm Tiramisu...even telling it out makes my mouth water. Yummmmm!!!!! From the time i came to the US post marriage my favorite restaurant has always been "Olive Garden". The unlimited breadsticks and the minestrone soup are more than enough to fill up your stomach that i hardly have the space to eat the entrée ordered.By default the dessert that i order is always Tiramisu. I love the dessert so much that i decided to try making it at home. So on a fine weekend i left my daughter with her dad (telling my hubby it was dad-daughter bonding time) and decided to try it out.

There are people who would do the whole Tiramisu from scratch but with a 8 month old i do not have too much time on my hands , so i normally buy the necessary ingredients.
I have two recipes i follow - one with eggs and one without.  Today i will give out the one without eggs. This is easy to make and if you are gonna have friends over for dinner , then you can make it in the morning and push it into the refrigerator to chill. Its ready to serve in time for dinner :).

So what exactly is a Tiramisu??? The below is a source from my best friend the Wiki :)

             Tiramisu (Italian: Tiramisù; Venetian: Tiramesù " [tirameˈsu]) is one of the most popular Italian cakes. It is made of savoiardi (otherwise known as lady finger biscuits) dipped in espresso or strong coffee or rum, layered with a whipped mixture of egg yolks, mascarpone cheese, and sugar, and topped with cocoa.


          The original recipe called for the following ingredients: savoiardi biscuits, eggs, sugar, mascarpone, cocoa powder, honey, and carbonated water.In the original recipe, there was no liquor as the cake was originally aimed at children and the elderly, and the original shape was round. The phrase tirami su literally means "pick me up" or "pull me up" in reference to the effects of the sugar and espresso.


Please bear with the photo for now as i am still practicing on the aspects of these photos. Will put up a better one soon :)

The source for my recipe is from the Betty Crocker Website which you can see here.
Prep Time : 30 mins
Total time : 4h 30 mins ( 4hrs to refrigerate)
Servings : Depends on how big or small a piece one cuts :)

Ingredients :
8oz softened Mascarpone cheese or cream cheese if one does not have Mascarapone ( leave the cheese out at room temp , if not microwave it for a min)
4oz powdered sugar
2tbsp light rum
8oz heavy whipping cream
1 package ladyfingers (some would say 12 would do , but i use all 24 from the package. I buy it from Trader's Joe as these are of better quality)
4oz  prepared espresso or strong coffee ( should be chilled)
4tsps baking cocoa
Chocolate shavings for serving


Preparation :
1. In a large vessel (comfortable  for you to beat in) beat the mascarpone ( or cream cheese) and sugar on medium speed.
2. Add in the rum and beat all together.
3. In a separate bowl beat the whipping cream till you see stiff peaks being formed.
4.Now mix both the mixtures together and beat them together (only on medium speed).
5.Slightly dip the ladyfinger's in the espresso ( dip it very lightly as otherwise they will turn soggy) and in any pan of your wish ( i used a 8*8*2 square pan) arrange the ladyfingers horizontally ( i used 12 on each layer).
6.Spread half of the cheese mixture evenly over the ladyfingers and sprinkle cocoa powder on top.
7.Now once again on top of the cocoa arrange another layer of espresso dipped ladyfingers , spread the remaining cheese mixture , sprinkle cocoa powder.
8.Wrap up the pan in foil or plastic wrap and allow it to refrigerate for 4 hrs.
9. When you want to serve remove the pan , cut slices , drizzle chocolate shavings and your Tiramisu is ready to eat.

Note: Please remember to leave it covered in the refrigerator.